Hosting an Elegant Winter Cocktail Party

This party idea was inspired by the newest addition to my cheeseboard collection.  I recently found this fabulous new marble cheese board with glass dome at Crate & Barrel, and decided that it only seemed fitting to take it for a test drive (aka host a cocktail party) ASAP!  

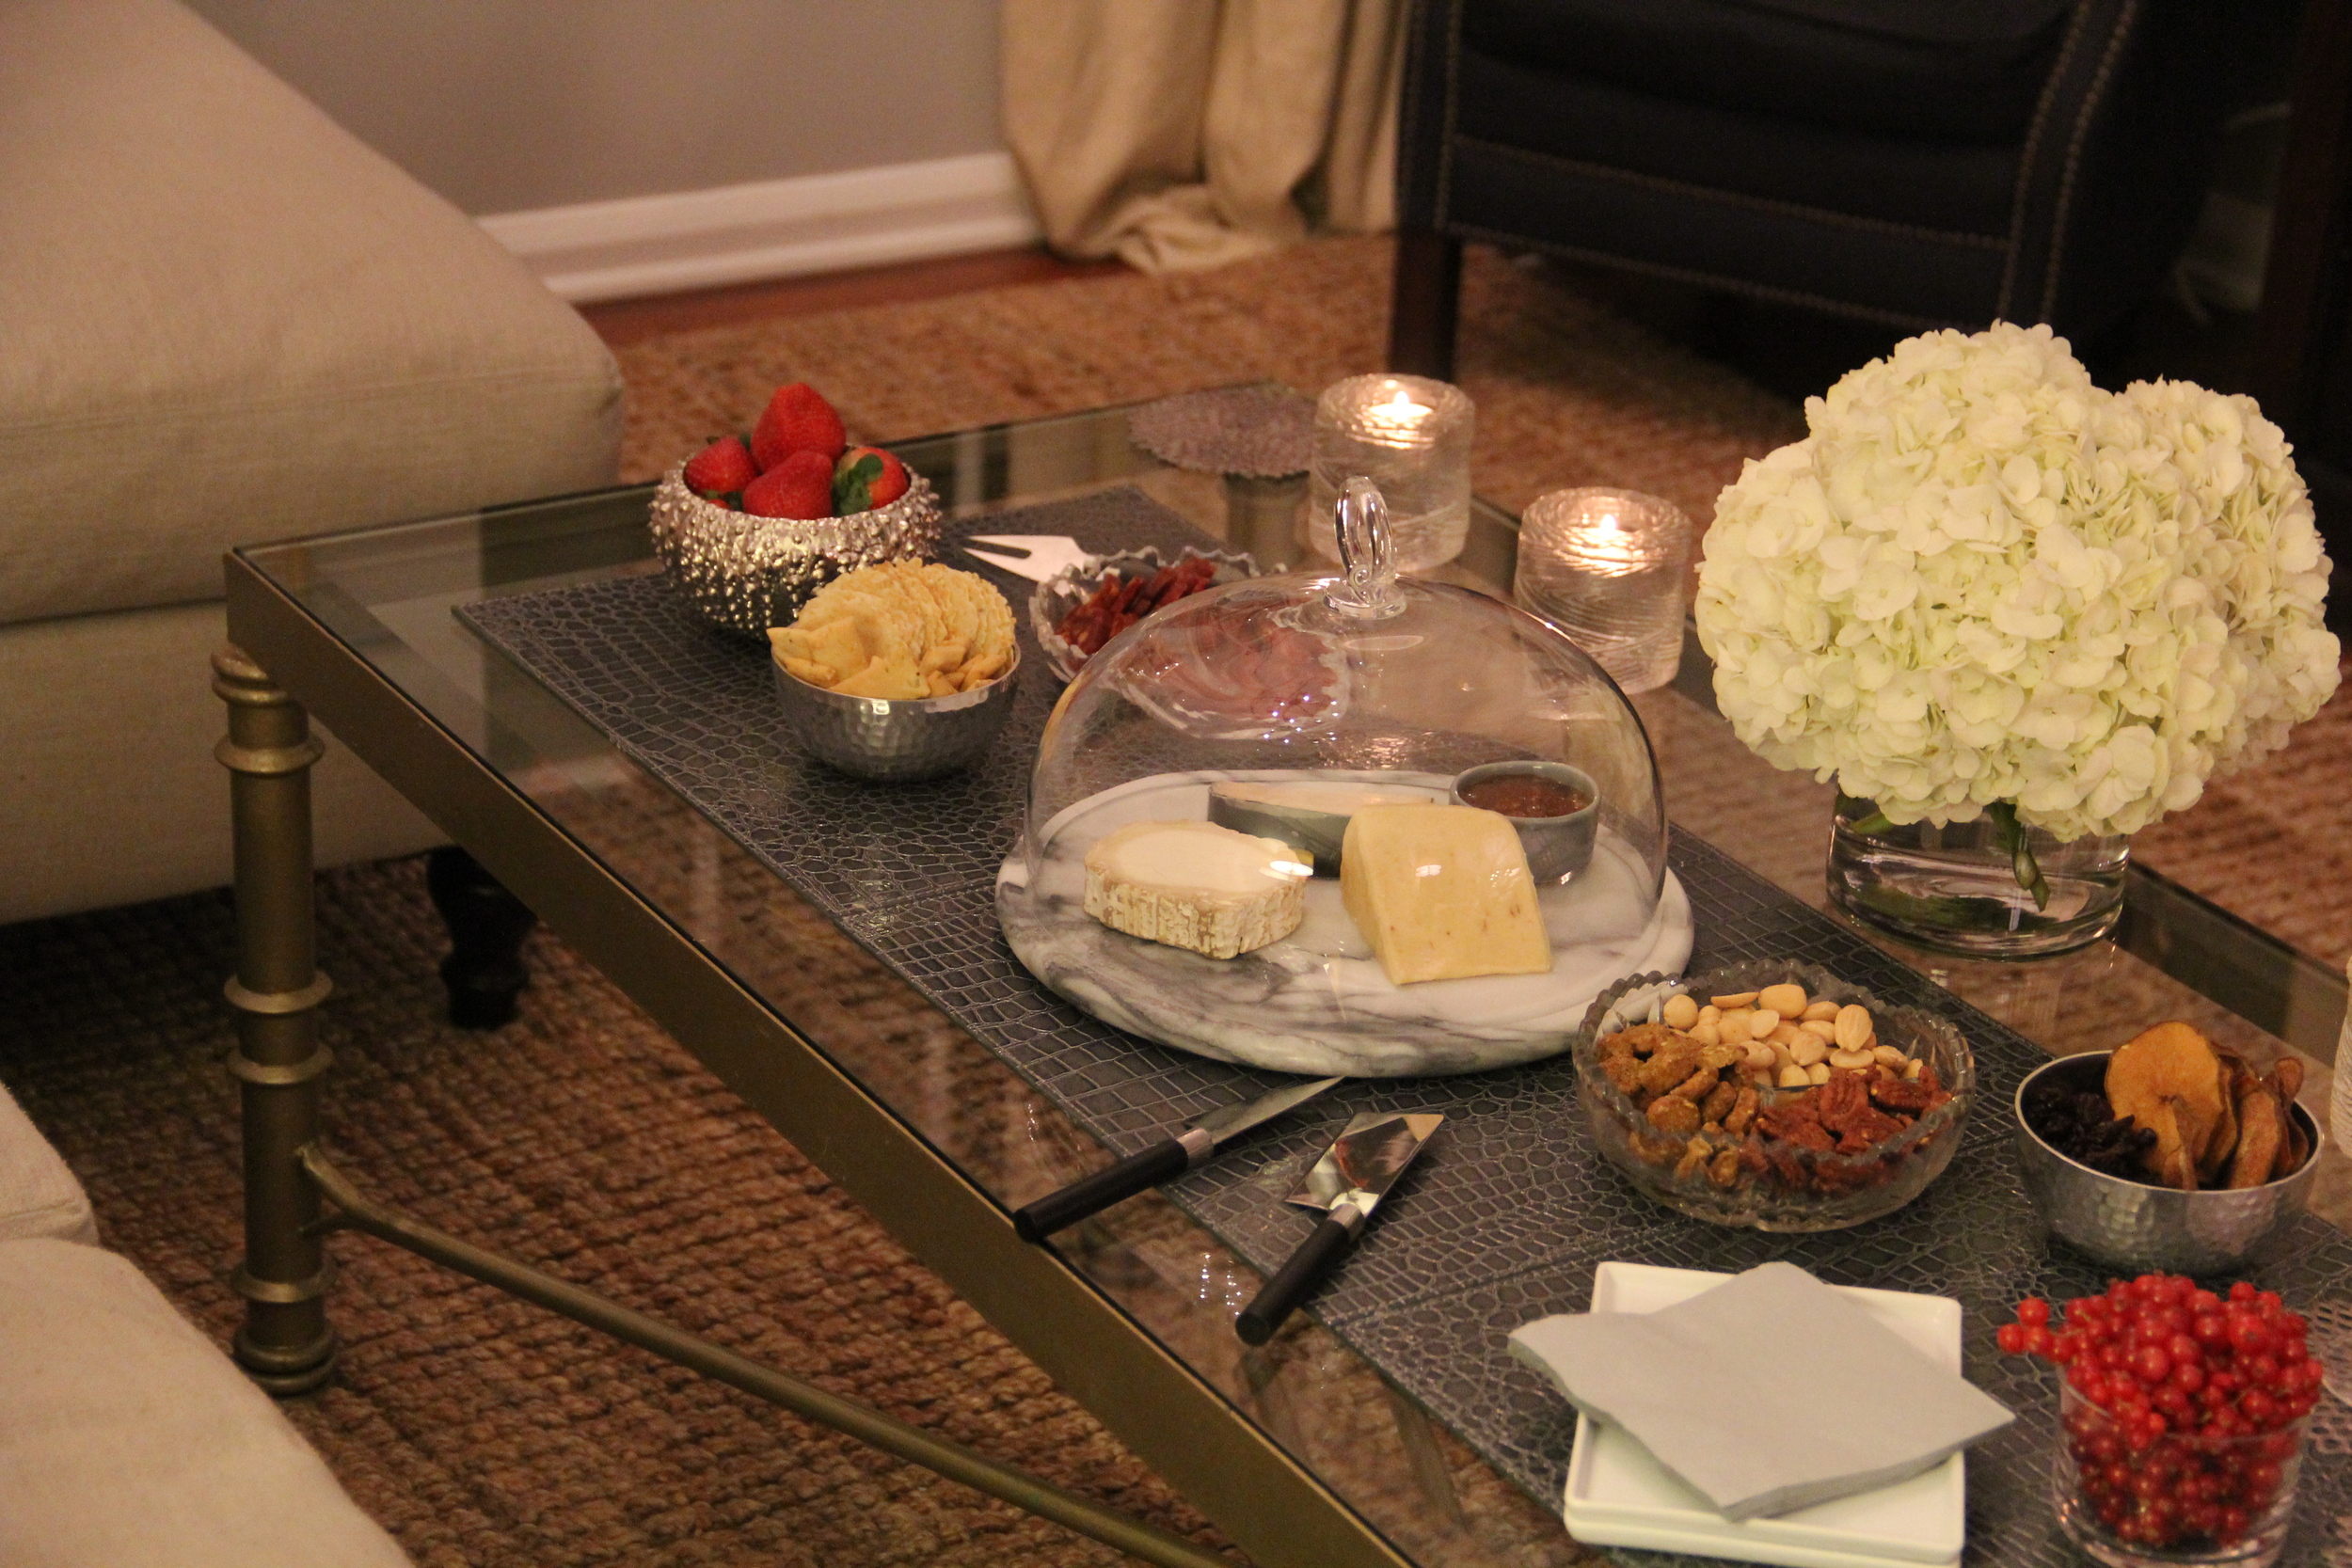
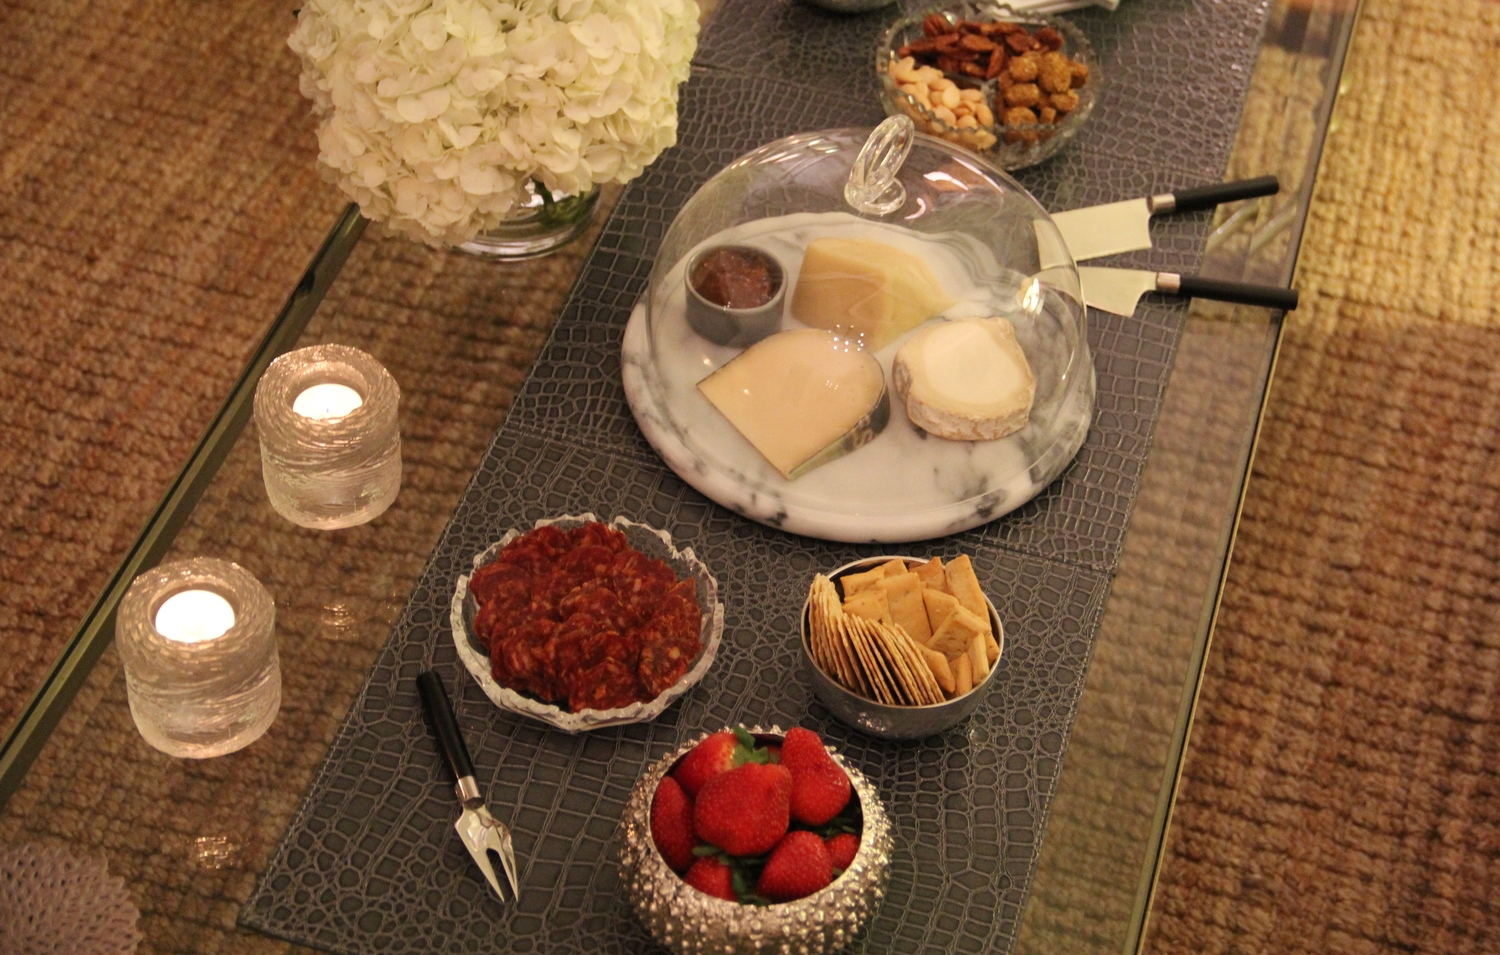
My goal with this look was to keep everything sleek and sophisticated.  I kept the color palette to a minimum by only using black, white, gray and silver table accessories.  I wanted to have a low but full floral arrangement, so I decided to go with white hydrangeas in a low glass cylinder vase.  Instead of using a table runner, I lined up 3 of my square gray croc embossed placemats (similar to these). I also chose to accessorize my new cheese board with my simple but modern CB2 cheese knives. 

Unlike my previous cheesescapes, I kept this board fairly minimal.  The reason for this approach was two fold.  First, the actual surface area is generous but not overly abundant.  Adding in my cheesescape extras (herbs, fruits, etc.) would have created a cluttered/cramped look.  The second reason (really the main reason) being that I did not want to take away from the fabulous dome!  The dome is such a unique and sophisticated addition to this board, so I wanted to make sure that it remained the focal point.  

Cheeses for this board included: Cypress Grove Midnight Moon (a personal favorite), Aged Cheddar with Carmelized Onions and a classic Bucheron.  Stonewall Kitchen's Old Farmhouse Chutney accompanied these three cheeses under the dome.  All nuts, charcuterie, fruits and crackers were served along side the cheeseboard in both silver and glass bowls.  

This party was so much fun and I loved that my new cheeseboard forced me to go outside of my comfort zone.  In the past I would have thought to only include all cheese accoutrements directly on the cheeseboard, because that always seemed to be most practical.  This time I was forced to think outside of the box to find a functional yet aesthetically pleasing way to include everything.  All said and done, I would have to say "mission accomplished!"

5 Tips for Maximizing Space in your Kitchen

My husband and I bought our first home almost a year ago.  The biggest change, aside from the obvious (owning instead of renting), has been the major increase in living space.  Our new house is by no means palatial, but it has certainly given us some breathing room and ample storage.  While all houses have their quirks and imperfections, ours is certainly no exception.  One of the drawbacks to our new house has been the decrease in kitchen space and storage.  It is a beautiful kitchen and is certainly equipped with all of the modern appliances, however, the design is such that the kitchen ended up being outfitted with a grand total of 2 drawers (please take a moment to count the drawers in your own kitchen so you can understand the gravity of my situation).  For someone who may not cook or entertain as frequently as I do, this kitchen storage is probably more than sufficient.  I on the other hand, am not an infrequent cook and/or entertainer, so it was necessary to find a way to make this kitchen fit my storage needs.        

Of course I love a challenge and my limited kitchen storage was definitely that!  I immediately got to work researching and Pinteresting my brains out to figure out how I could maximize the storage in this space without making it feel cluttered or claustrophobic.  In the end, I found a wealth of resources, tips and tricks.  Below I have shared my 5 favorite tips that have really make the biggest impact in creating the additional kitchen storage I so desperately needed.  

Tip #1- Use a Kitchen Utensil Holder

When you are limited on drawer storage, using a crock is a great way to create additional storage space for your cooking utensils.  In addition to providing the extra storage, it's also convenient to have certain utensils readily at your disposal while cooking.  My one piece of advice here would be to try and keep the number of colors used in your crock to a minimum.  I purposefully chose to only display wood, metals and black plastic utensils in my crock, primarily because I think that having a bunch of different colored spatulas on display can make your space look like a cluttered circus.  

Tip #2- Display things that you regularly use

I cook and bake quite frequently, so there are certain staples that I like to have on hand in order to increase the convenience and functionality of my kitchen space.  The only electrics I have on display are my Kitchen Aid mixer (because of my baking) and Coffee makers (yes plural--I guess you could say I have a bit of a coffee habit).  Additional items I find useful to have on my countertops include: a cutting board, bread box, knife block, cookbook stand, salt crock, utensil crock, spoon rest, baking canisters, soaps (dish & hand), a kitchen candle, paper towels (mounted to the wall) and my fruit bowl.  

Tip #3- Repurpose Kitchen Items

I have touched on this concept in my Fruit Bowl post, but a great way to save on space is to repurpose kitchen items.  Below I have taken my salad bowl and converted it into a fruit bowl.  My pasta serving dish now doubles as shelf decor, thanks to this picture stand I found at Michaels.  In addition to those two ideas, my Larousse Gastronomique Encyclopedia has provided a decor stage for my water pitcher and orange jam jar.  

Tip #4- Baskets

Baskets have been the key to coping with my drawer situation (or lack there of).  I found these Water Hyacinth baskets at the Container Store and just love them!  I am able to store all of my baking supplies and various other cooking tools that I don't necessarily use as frequently.  These baskets have also been a great pantry alternative for extra chip bags, dry goods and other non-parishables. 

Tip #5- Look Up and Down, not just straight ahead

One of the best storage solutions I have found in this kitchen is on top of the cabinets.  I have been able to fit my baskets filled with pantry items and cooking accessories, cookbooks, serving pieces and even my wine rack!  Had it not been for this additional space, I don't think that having my 2 drawer situation would have been manageable.  

In addition to the space above the kitchen cabinets, I have found plenty of additional open real estate in my kitchen that has allowed me to house various kitchen items that typically aren't the easiest to store (ex. kitchen step stool and a variety of kitchen storage wraps and plastic bags).  

Valentine's Day Cocktail Party for Two - Dessert & Champagne Bar

Part two of this Valentine's Cocktail Party for Two might be the most essential part of this evening-- Dessert and Champagne!  I didn't want to go wild with the food and have my husband rolling out of the room at the end of the night, but there was no way that I was going to host a romantic Valentine's evening without a few chocolates and glasses of bubbly.  

I also want to point out that this evening works really well if you are single and want to host a Valentine's themed party for a group of your single friends.  The only adjustments I would make would be to add more cheese, appetizer plates and champagne (depending on your total number of guests).  This day is about being with those closest to you and having fun, so if that means friends, great!  

Desserts:

If there is one thing my husband LOVES, it's a "sweet treat" or two.  Still worried about overloading my husband with food, I wanted to have a modest dessert selection.  I decided to select little bites that kept in line with the Valentine's/Romantic theme and didn't require a ton of prep work.  The results were both delicious and festive. 

Champagne Bar:

I love serving champagne with all of the "fixings."  There is something about the ability to customize your own glass of champagne that really makes it unique, festive and extra delicious.  For this spread, I included  blackberries, raspberries and fresh red currants.  Other tasty additions could be pomegranate seeds and champagne cocktail ingredients (sugar cube + bitters).  

Table Decor & Other Accessories:

The concept I wanted to stick with when designing this table was simple, chic, festive and functional.  I kept the color scheme to red, gold, black and white, and brought over only one piece of patterned tableware from the cocktail table (my Scalamandre Cocktail Napkins).  This way I could create both a cohesive and romantic aesthetic without going overboard on the decor.   

As is my goal with every post, I want you to feel both inspired and empowered to recreate these concepts I'm sharing in your own home.  Whether you choose to have a romantic cheesescape for two or a Valentine's Dessert & Champagne party with your friends, I hope this post has given you a new perspective on how to celebrate this holiday.